Block Feature
The Block Feature is used to connect multiple features into single, grouped structures that can be easily moved around and arranged on your website.
Note: This article on using a Block with Image Vs. Gallery Feature will help you decide whether to use a Block or Gallery Feature when displaying an image.
Add A Block To Your Website
1. To add a Block to your website, select the Features panel, and drag the Block Feature to your page.
2. Open the Background menu and adjust the background color using the pre-selected color palette.
3. The background can be either a solid color or a linear gradient. Adjust the Color and Gradient Settings.
4. You can also add a background Image to your Block. Select an image that you've already uploaded or click the Upload button to add a file from your computer that you can then use.


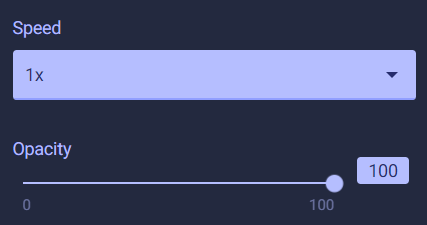
5. Background video on Block. Set a video as a Block background. Define the video playback timing under Speed.
- Min value = 0.25x
- Max value = 2x
- Step = 0.25
- Default value = 1x
Use the Opacity slider to change the transparency level of the video, which also helps to hide artifacts in lower quality videos.
Check the Play video in a loop box to automatically play the video continuously without any intervention after it reaches the end. Check the box on Overlay Pattern to add an overlay design to the video. This is a common technique used to hide a low quality video's artifacts by overlaying a color or a pattern.
Fill setting defines how a video responds to the height and width of its content box (block feature).
6. The Rounding slider allows you to round the edges of your Block corners.
7. Add Borders to any or all of the sides of the Block Feature. Adjust the size of the border with the slider, and select a color for the Border using the pre-selected Color Palette, or the Custom Color Picker. You can also adjust the Border Hover Color that will change the borders when someone hovers over your Block Feature.

8. Add a Box Shadow to your Block Feature. Adjust the position of the shadow, the amount of blur, the color and the opacity in the Border and Shadow Settings.

9. Place an Anchor, then link a Menu item to it and design an incredible one-page scrolling site. You can also link two Blocks. An Anchor allows you to jump to a specific point on a website page rather than having to click through multiple pages. It saves users the need to scroll and makes navigation easier.

10. Type the URL or select another pre-existing page or Block with an Anchor to connect it to. This means that by clicking on this Block, a user will be redirected to another site page, block, or to the external site.

Join Features Inside The Block
Have multiple features layered on top of one another? It can be hard to select and move these all at once when they're being treated as separate items. Group them all inside of one block, and you'll be able to move and arrange them on your page all at once! To make one or more Features a 'child' of the 'parent' Block you must place the entire Feature inside of the Block. You can attach any Feature in the Site Builder to each other inside of a Block!
Parent-child resize restrictions:
- Each parent can be resized up to the child's features.
- Each child feature cannot be resized outside the dimensions of the parent feature.
Examples:
1. Below, a Block is used as the background, stretched across the page, made slightly opaque, with social media Share Buttons and a Text Feature placed inside.
Note: It is ok for items to extend beyond the safe zone as long as their is no important content there. When viewed on a smaller screen or tablet, content outside the safe zone might not be seen.
 2. Below, we have a Block used behind a Tour Feature with an Image background, adjusted to fit the width of the screen.

3. Here we have a Block with an Image, combined with Text Features, a Follow button, and Social Links, placed inside the larger Block. The text with the Artist name has a parent/child relationship. Block 21 falls below Block 17 and therefore does not have the parent/child relationship causing those features to move below Block 17 on the mobile view.

4. In the image below, Block 7 has a text feature inside utilizing the parent/child relationship. However, Block 7 goes below the Block containing the Image, so when the website it optimized for mobile viewing, the Block with Text moves below the image.
As always, blocks are cropped when converted to mobile view, so if your image was cropped too much, remove the Block and use a Gallery Feature. 